Stopping the wobble will take a lot of drilling. (And I'll get rid of that "hammock" thing.) The L-plates will brace the uprights and their weight will lower the centre of gravity.
The stones on the bottom will also help hold it down.
But the cloth was greeted with shrieks of horror - and I immediately saw why; it looked "like a shop display" - no, we don't want that! This version is better -
And, finally, out into the display area it went.
Then, on with trying out some other media for the little houses - this is my first encounter with balsa wood - you can carve it with a scalpel, lots of fun -
The tape inside (hinging the corners) could have bits of this'n'that trapped in it...
29 November 2009
Sculptures in situ
Somehow I got to think of the piece as "Welcome to the House of English" - it incorporates dictionaries, after all, and the walls include strips of text. The spacing of the rungs indicates that the more you have in common, the easier it is to communicate, to reach a meeting place.Another view of its neighbour, James's winsome fellow - he went out last week -as did Jo's bear. On the other side of the case it says "Bear Down" -
Mike's looks very much at home -
whereas Sarah's seems ready to flee in panic -
On their first appearance, Charlotte's little mice rapidly disappeared; her fox, that urban scavenger, makes the point better - and let's hope the mice are left in peace this time -
Back in class, people were going to great lengths to photograph their sculptures before taking them outside -
Crisp white backgrounds were much in demand -
How could I have forgotten to photograph mine "properly"? Maybe a little photoshopping will save the day -
More pages from the "love book"
It's been a while since I posted anything from my book of "things I love" - since 4 November in fact (where does the time go). Here's my cactus collection, I love how they are thriving, despite being knocked out of their pots occasionally until I rearranged the plants along the windowledge so the cactuses wouldn't get in the way of opening the window -This inventory of circles revealed that I have 42 colours of those chunky Stabilo crayons. They are water soluble and nice and waxy to draw with -
The dog is dark metal - he comes from India. Did you know that people prefer light-coloured dogs, to the extent that dark ones, through no fault of their own, are much less likely to get rehomed from animal shelters? It's called "black dog syndrome" and applies to other things than black dogs.
28 November 2009
Ceramics week 10
A kiln cooling - listen closely and the pots quietly go ping - ping -
The demonstration today was of screen printing onto slabs. First make your screen - this one is made with emulsion from a photo (it needs a special machine to do so), and stretched on a picture frame -
Another screen printing possibility is to mix a little "medium" into the slip, and print on thick paper or fabric. That can be put on the clay, and in the firing the paper or fabric burns off, leaving the clay behind as a "print". I've brought some home to try (but first must clear off my workbench, which still has wax from the sculpture project).
You can use stamps to impress into the clay, and then fill the dips with coloured slip - and once it's dry, print with a darker colour, so the slip looks like a shadow -
Most of my glazed pieces came out of the kiln during the week. I'm trying to figure out, from my notes, what's what - this learn-by-doing method could take a long time -
Before and after - the black slip has gone quite dark with the stoneware firing, and the clear glaze gives it a nice quality -
But this is my favourite - the pins in the clay have bubbled up a treat, making a good contrast with the printed slip under a clear matte glaze on the other side. I'll use this combination again. At last, a bit of "vocabulary" for the next project!More of the same here, in one of my "mouths of hell" - it's quite an ambiguous object -Towards the end of the day these came out of the kiln - I need to figure out what's what -At last I've moved on to making slabs into "little houses" (of a sort) - keeping it somewhat simple, black slip and possibly clear or white glazes later. The "stilts" from the sculpture project are making an appearance -
The sloping floors make semi-secret areas underneath -
Let's see what happens with the pins across the windows. They're from a box of office pins, nice and sturdy, I got for 10 pence many years ago; I'll be trying tacks and nails too -
It takes me quite a while to get going in class, and then at the end of the day I don't want to stop - by then I have a long mental list of what to do next. It takes actually handling the material to get the ideas going.
27 November 2009
"Between Dog and Wolf"
This is a beautiful book by photographer Chrystel Lebas, long-exposure photos taken in woods and forests. The entire book is on her website here - in the bluebell wood section, as you go through the pages the light fades in the woods - magic.
I first saw her work in the Twilight exhibition at the V&A in 2006. The panoramas of fading light in forests are between 1 and 2 metres long. The snowy-blue twilight winter forests are wonderful too.
A small urban disaster
26 November 2009
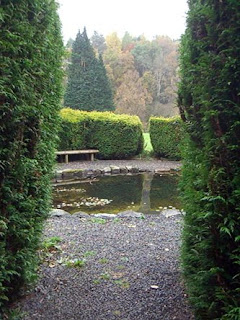
Wye valley, Wales
It's a year since our trip to Wales to mark my freedom from the 9-to-5. It was a lovely few days, with interesting things to see - the remaining stones of a 13th century abbey in a quiet valley that was once much more lively, churches that re-used some of the stones from the abbey after it was dissolved by King Henry, Welsh quilts, sculpture, scenery, sheep, and - weather.
Core studies week 10
After a pep-talk about our upcoming assessment, and about those applications for BA courses, we got on with our own work, mine being developing "little houses". Here are some I prepared earlier - much earlier - maybe 10 years ago...
A handful of "those useful coffee-stirrer sticks" and some stitched squares that happened to be in my bag led to this arrangement of "safe houses", with floods in mind -
My bag also had some handmade paper I'd prepared much earlier - it quickly made a little city on a riverbank -
To make windows in the houses, I painted the shapes with water, then pushed through the wet paper with the tip of the brush and picked away the wet bits -
These are looking a bit like houses in Yemen -
Another way of adding detail was to stitch some windows - much more time-consuming and less successful; needs a darker thread, perhaps?
My next excursions developed the idea of connecting doors. The look of concrete is obtained by frottage - with the side of a graphite stick over a strip of paper lying on a paint-spattered table -
Positioning the doors, and the direction they open, has lots of possibilities. And folding the paper in various ways - as well as adding windows - makes for too many possibilities! I have to have a rethink of what I'm actually aiming at.
Printing with the folded-paper strip makes for a rather labyrinthine house-plan - more like a village.
Next I'll look at some non-western buildings, and plans of archaeological sites, to see if they add to my theme; they may not be directly relevant, but I'm always on the look-out for serendipity.
Subscribe to:
Posts (Atom)